Protohackers Solving Problem 0 with C#
In this post we implement a TCP Echo Service using C# to solve Problem 0 of the Protohackers challenges.
Protohackers provides you a set of challenges to create servers for network protocols. You can use whichever language you'd like, the implementation just needs to be publicly accessible so the automated tests can run against it.
During my Christmas break I decided to give Protohackers Problem 0 (Smoke Test) a try and implement a TCP Echo Service using C#. The gist of challenge 0 is essentially the following:
2. Whenever you receive data from a client, send it back unmodified.
3. Make sure you don't mangle binary data, and that you can handle at least 5 simultaneous clients.
Now admittedly it's been a looong time since I tried to do anything with network protocols/sockets so feel free to let me know if there are any improvements that can be made! To start the project off I created a .NET 7 command-line project.
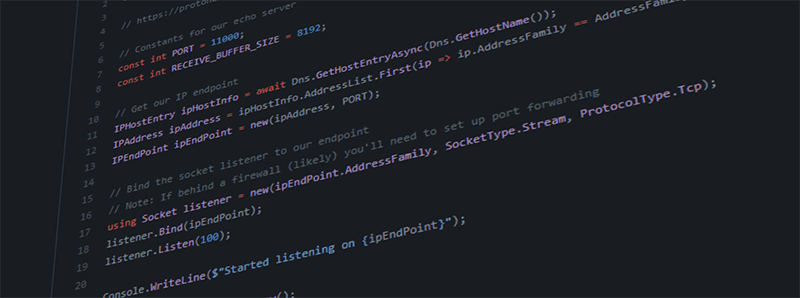
The ultimate goal of our service is to echo back data that is sent to our service. In order to do this we must first be able to handle connections to our app. Lets look at the code that allows us to start listening to connections and I'll explain a few details afterwards:
using System.Net.Sockets;
using System.Net;

// Constants for our echo server
const int PORT = 11000;
const int RECEIVE_BUFFER_SIZE = 8192;

// Get IPv4 endpoint
IPHostEntry ipHostInfo = await Dns.GetHostEntryAsync(Dns.GetHostName());
IPAddress ipAddress = ipHostInfo.AddressList.First(ip => ip.AddressFamily == AddressFamily.InterNetwork);
IPEndPoint ipEndPoint = new(ipAddress, PORT);

// Bind the listener
using Socket listener = new(ipEndPoint.AddressFamily, SocketType.Stream, ProtocolType.Tcp);
listener.Bind(ipEndPoint);
listener.Listen(100);

Console.WriteLine($"Started listening on {ipEndPoint}");
Get IP Endpoint
Lines 8-11
To determine the proper IP address to listen on I filtered ipHostInfo.AddressList and returned the first IP that was an AddressFamily.InterNetwork which translates to an Address for IP version 4. This essentially gets my machine's local IPv4 address (example: 192.168.1.25).
TCP/IP uses a network address and a service port number to uniquely identify a service. [1]
The port is hardcoded in our constants so with the IP address and our port we now have our endpoint defined.
ipHostInfo.AddressList and find the proper interface you want to use and filter to that address accordingly.Bind the Listener
Lines 13-16
We now need to start listening for connections so that our service can communicate with clients that connect to it. To do this we need to create a socket using the endpoint information we previously created.
A socket creates a data pipe between your app and the remote destination. [1]
Calling bind on the socket will bind the socket to the endpoint. And finally calling listen lets the socket start listening for incoming connection attempts. The backlog parameter of the listen method specifies the number of incoming connections that can be queued for acceptance.
We're not done yet! We can now listen for connections but we haven't handled the process of accepting the connection, receiving data, or echoing the data back. We'll take a look at that next.
Accepting Connections
Continuing from where our code previously left off:
SocketAsyncEventArgs e = new();
e.Completed += AcceptSocketCallback;
if (!listener.AcceptAsync(e))
{
    AcceptSocketCallback(listener, e);
}

// Keep console active until keypress
Console.ReadKey(true);
In order to handle our connections in an asynchronous manner we create a new SocketAsyncEventArgs class and attach to the Completed event.
Accepting connections asynchronously gives you the ability to send and receive data within a separate execution thread.
Next we check if the listener.AcceptAsync operation completed synchronously and if so we manually execute the callback function (see note below). Maybe I could have wrapped this in Task.Run.
IfAcceptAsyncI/O operation is pending theCompletedevent of ourSocketAsyncEventArgswill be called when the operation finishes. However, if the I/O operation completed synchronously theCompletedevent will not be raised and we need to manually execute the callback method. [2]
Now lets look at the AcceptSocketCallback method to see how we communicate with clients that connect to our service.
Communicating with clients
static async void AcceptSocketCallback(object? sender, SocketAsyncEventArgs e)
{
    if (sender == null) return;
    Socket listenSocket = (Socket)sender;

    do
    {
        try
        {
            Socket? newSocket = e.AcceptSocket;
            if (newSocket == null) return;

            Console.WriteLine($"Connection open {newSocket.RemoteEndPoint}");

            byte[] buffer = new byte[RECEIVE_BUFFER_SIZE];
            int received;

            do
            {
                received = await newSocket.ReceiveAsync(buffer, SocketFlags.None);

                if (received > 0)
                {
                    Console.WriteLine($" << Received {received} bytes...");

                    // Echo the data back
                    await newSocket.SendAsync(buffer[..received], SocketFlags.None);
                }
            } while (received > 0);

            Console.WriteLine($"Connection closing {newSocket.RemoteEndPoint}");
            newSocket.Disconnect(false);
            newSocket.Close();
        }
        catch
        {
            // handle any exceptions here;
            Console.WriteLine("Oops an error occurred!");
        }
        finally
        {
            e.AcceptSocket = null; // to enable reuse
        }
    } while (!listenSocket.AcceptAsync(e));
}
We start with a do...while where we will continue to loop if the AcceptAsync result is false. Remember in the previous code if it completes asynchronously then it will fire the Completed event so we won't need to manually run AcceptSocketCallback otherwise we must run the callback ourselves.
On line 10 we call e.AcceptSocket which returns a socket that we can use to send and receive data with the client.
Lines 18-29 handle the receiving, and echoing, of the client data. In this do...while block we're looping until we haven't received anymore data from the client and we're receiving it in chunks up to our buffer size and then immediately sending it back to the client using SendAsync.
Notice that ReceiveAsync returns an int which is the size of the received data. Since we might receive less than our buffer size when we send our data back we use buffer[..received] (using C# 8's range feature) which also allows us to simply reuse the buffer instead of instantiating a new one.
Finally once we have no more data from our client we can disconnect and close the client socket. Our last bit of cleanup is to set the e.AcceptSocket to null which allows that socket to be reused.
And that's the entirety of the code. Once you have your service up and running you just have to test it using the automated tests on the Protohackers Problem 0 page and you should see a pass:
Review
In this post we were introduced to the Protohackers Problem, learned how to build our IPv4 Endpoint and bind a listener to it. We learned how to accept incoming connections and finally we saw how we can buffer incoming data and echo it back to the client.
You can find the complete source code on GitHub.
Good luck! Have fun! Keep Hacking! And if you've found any issues or better ways to handle this feel free to reach out!